There is a misconception in the repair industry that materials that are deployed in the mining industry are basic in specification, metallurgical composition and heat-treated status; nothing could be further from the truth.
Another misconception is to draw conclusions from Australian Standards as to the materials specification, and from there to run inadequate weld procedures and or to substitute materials manufactured to the incorrect specifications for the pWPS, PQR and WPS development.
Structural repairs to both mobile and static plant when not carried out with due diligence will lead to reoccurring failures of the component or total loss beyond economical repair.
This article shares the process being used for the characterisation of materials, consideration of heat-treatment requirements and challenges localised pre-heating as an alternative to harmonised pre and post heating, and development of correct welding procedures for repair work of mining equipment.
Material Characterisation:
The fundamental (first principal) of welding is to know what the material is that you are welding prior to development of welding procedures, choice of welding process and consumables.
Materials in the mining industry generally meet the specification of the country of origin of the equipment or country where the design was carried out. (I have not yet encountered a proprietary grade material).
Examples of this are crushing equipment designed in America but manufactured in a number of different countries outside the USA; meet the ASTM group of specifications.
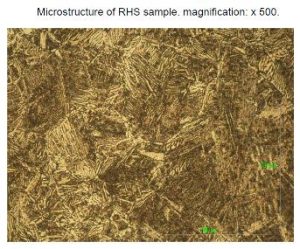
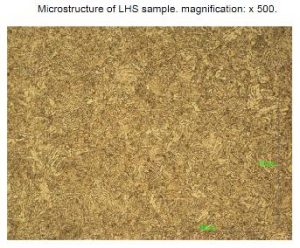
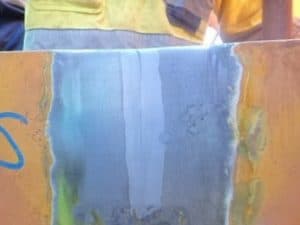
Many of the Japanese pieces of equipment meet the JIS group of standards. Characterisation of the material will also help in the discovery of non-conformances by the OEM. Below are two micros of the same specified material (JIS 5111 castings). It is evident there was a manufacturing issue at the foundry.
Chemical Analysis Below.
Repair option after material characterisation was abandoned and warranty was pursued from the OEM in this case for a new component.
The basics steps that are used for material characterisation are;
- Remove a sample from the equipment to be repaired taking care to keep the material cool (≤200°C) so not to change the microstructure of the sample.
- Have the sample analysed for hardness, chemistry inclusive of the boron count and a micro examination of the sample to determine the heat-treated status of the material.
- Alignment of the material to the country of origin’s standards for the materials specification.
From this initial information conclusions can be made for the development of the pWPS.
Materials that cannot be sourced to run the PQR may have to be reproduced. If reproduction of the material is not commercially viable and substitution is used due diligence must be exercised in the selection of the material to as closely align to the materials specification that is being repaired (not just by the material grouping number), particularly the heat-treated status of the material should be assessed.
Challenging Preheat Requirements:
When developing the pWPS consideration needs to be given to the preheat temperature, post heat and stress relieving requirements of the repaired item.
Some of the Australian Standards are prescriptive in their requirements which limit the application of lower pre-heat conditions. ISO standards are performance based and offer the opportunity to lower preheat temperatures provided that the testing results of the test coupons meet the acceptance criteria of the standard.
Some Australian Standards require testing prior to post weld heat treatment. This is not a true representation of the finished joint and once again becomes prescriptive rather than performance based.
Consideration needs to be given to homogenised preheats maintained for the duration of the repair and data logged for future reference. This allows for the lowering of the pre-heat temperatures and better hydrogen purge during repair. BS EN1011 gives good guidance.
The actual chemistry of the material should be used for the determination of the preheat temperature, not material groups within prescriptive standards or guidance publications.
Where doubt exists when using lower preheat temperatures Controlled Thermal Severity (CTS) for fillet welds or JIS 3158 Method of Y- Groove Weld Cracking Test should be considered to prove the performance of the consumable and base material when welded.
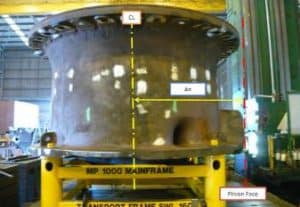
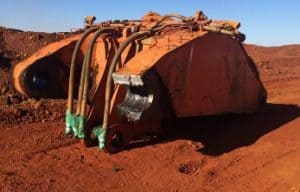
Cost reduction opportunities exist to reduce preheat temperatures provided there are control mitigations in place. Figure 1 shows a 48T casting where the preheats were lowered 100°C from the requirements of AS1988. A significant cost saving was made without compromising quality.
Post Weld Stress Relieving:
Many of the structures particularly in the mobile equipment fleet are made up of different ferrous materials; high strength cast components and plates with different mechanical properties.
Prior to the deployment of thermal stress relieving an understanding of all the material properties in the component is necessary.
When materials are characterised and are found to have been quenched and tempered, tempered or tempered from normalising there must be an understanding of the final temper temperature used.
Where temper temperatures have been below 620°C the stress relieving temperature and time at temperature needs to be revised to avoid annealing the material and to avoid the possibility temper embrittlement.
Development of Welding Procedures:
When developing welding procedures consider the use of performance based standards in particular ISO.
ISO call for more testing and the initial mechanical testing costs are higher however assurances are higher.
What Can Possibly go Wrong?
The following slides are all failures that were 100% avoidable had the material been characterised and correct Welding Procedure Specifications developed for the work.
These failures are costing the industry millions of tonnes of lost production and export opportunities each year along with lost royalties payments that would have flowed onto the wider community.
Figure 2: Unauthorised welding resulted in a failed loader boom, 125mm through thickness 1200mm boom section. No welding procedure, no material characterisation.
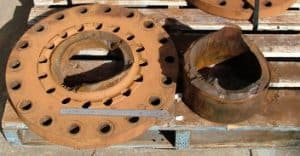
Figure 3 shows the failure of a shovel stick; the failure was the result of ID welding the bore of the high strength casting prior to line boring. Failure was induce by high hardness in the HAZ and hydrogen.
No material characterisation no qualified WPS.
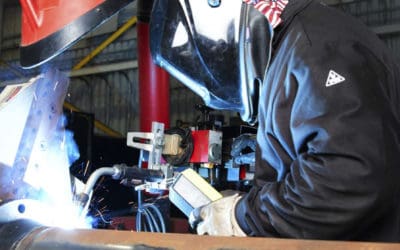
Figure 4: failed repair through the centre of the repair weld.
No material characterisation no qualified WPS under matched consumable. Specification is not known remember the first principal know what you are welding.
Reliance on the OEM for welding guidelines is not best practice. The welding in figure 4 was executed in compliance with the OEM’s recommendations.
When welding high strength castings have the consumable manufacturer qualify the boron count in the consumable when selecting the consumable for the pWPS.
In closing remember the definition of insanity from the great man below;
Nomenclature:
JIS – Japanese Imperial Standards
OEM – Original Equipment Manufacturer
pWPS – preliminary Welding Procedure Specification
PQR – Procedure Qualification Records
WPS – Welding Procedure Specification
Article written by: Travers, James

